Coming up with lead magnet ideas can be stressful.
You know it has to be tailored to your target audience. And it has to be something valuable enough to get someone to subscribe to your email list.
And it’s not something you can skip. Having a resource is vital to building and email list and any content marketing strategy.
Once you have one, it’s all gravy. You can put it all over your site, suggest people download it via email or live chat and watch the subscribers convert.
But maybe design isn’t your strong suit.
Creating a lead magnet resource that’s worth downloading (heck, even shareable) isn’t that tough.
Before you’re through reading/watching this post, you’ll have 3 “go-to” methods for creating a dynamite lead magnet on the same business day.
Sound good?
Great! Here’s what we’ll cover:
- Creating a Well-Designed Template in Half a Day
- Blog Post ReDux in a Couple Hours (Tops)
- Putting Together a Checklist in Around 20 Minutes
- Adding a Lead Magnet to WordPress and Your Site
To shake things up and give you even more options, I’ll be using a different tool to create each lead magnet idea.
Creating a Well-Designed Template in Half a Day
Templates are a great lead magnet for B2Bs to use. Helping other businesses by creating tools they can implement in their business is a common tactic.
So why would you use Keynote (or PowerPoint) to create them?
We’ll go over that really quick. HubSpot made these famous they created infographic templates, business templates, all sorts of things.
But you can use them for sales decks, presentations, business planning tools that you can actually create as lead magnets to get your B2B customers to download and use them themselves.
Example: Let’s say, you sell lead generation services and specialize in helping plumbers gain small business clients.
You could create a sales deck specifically for plumbers to use when pitching small businesses in their area. Then, make sure to collect their email address when they want to download it and you’re ready to pitch them your lead gen service.
So why would you use Keynote (or PowerPoint)? We’ll go over that really quick. HubSpot made these famous they created infographic templates, business templates, all sorts of things.
But you can use them for sales decks, presentations, business planning tools that you can actually create as lead magnets to get your B2B customers to download and use them themselves.
Example: Let’s say, you sell lead generation services and specialize in helping plumbers gain small business clients.
You could create a sales deck specifically for plumbers to use when pitching small businesses in their area. Then, make sure to collect their email address when they want to download it and you’re ready to pitch them your lead gen service.
What I’m going to create today is a content strategy template that I actually used when I first started for ConvertFox, which is now Gist.
Setting Up Your Blank Canvas
When you open a blank Keynote, it’s the traditional size.
That’s actually not a great idea because if you open one up, once it’s turned into a PDF, it looks opposite of what we’re used to seeing. People are used to a more horizontal ebook design and we could change that very easily.
If you go to the upper right hand corner and click on the “Document” icon, it will open up several settings. Further down in that right sidebar, you’ll see slide size as an option. Click “custom size” and you can change these dimensions.
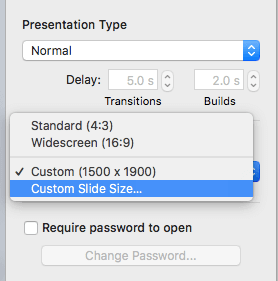
Now, 8.5 x 11 is the like a big workbook and it’s 2550 x 3300 pixels.
You don’t have to do that size. Hardly anybody’s going to print these out. Unless that’s what you’re going for, then you might want to go the full 2550 x 3300.
I used 1500 pixels width x 1900 height, that’ll give us that nice entered book looking shape. Go ahead and take off of these. The first thing I want to do is create a cover for my content strategy guide.
Sourcing Your Images and Graphics
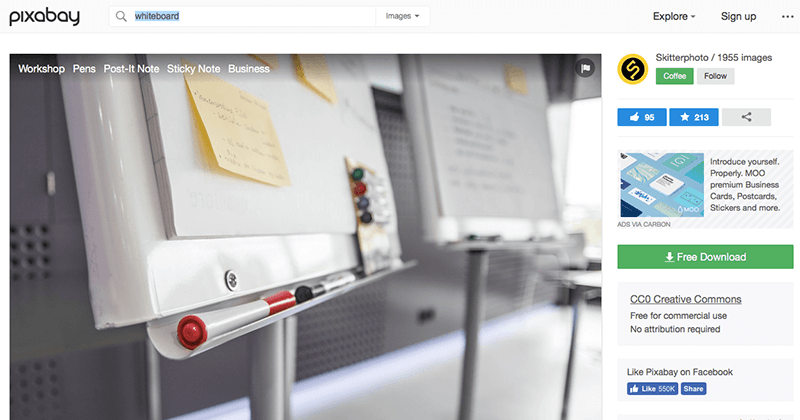
I went to Pixabay, which is a great site to get free images. And I just typed in “whiteboard” because I’m thinking strategy, I’m thinking content. And what better to represent that than a whiteboard. I really loved this image. So I downloaded it.
We’re going to need a few avatar-style images for later and a manilla folder to get the look I wanted — I search for “avatar” and “manilla folder” separated. Each time, I clicked “illustrations” next to the search bar to pull up only illustrations.
Here’s a screenshot of the avatar search.
![]()
Key Tip: No matter what lead magnet ideas you’re using, it’s a good idea to think about the look and feel of your resource. Creating things like an outline and jotting down your design ideas can go a long way toward speeding up this process.
Creating the Cover Page
To start, I dragged the “whiteboard” image I downloaded right into the Keynote. Then, I stretched it to cover the entire front page.
After it was situated the way I liked, I lowered to opacity to 50%. This allows the image to look nice without drawing too much attention.
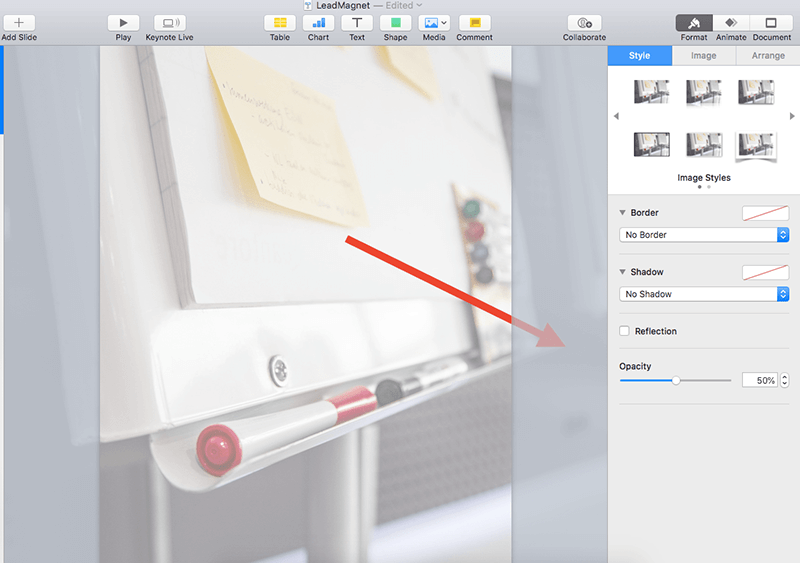
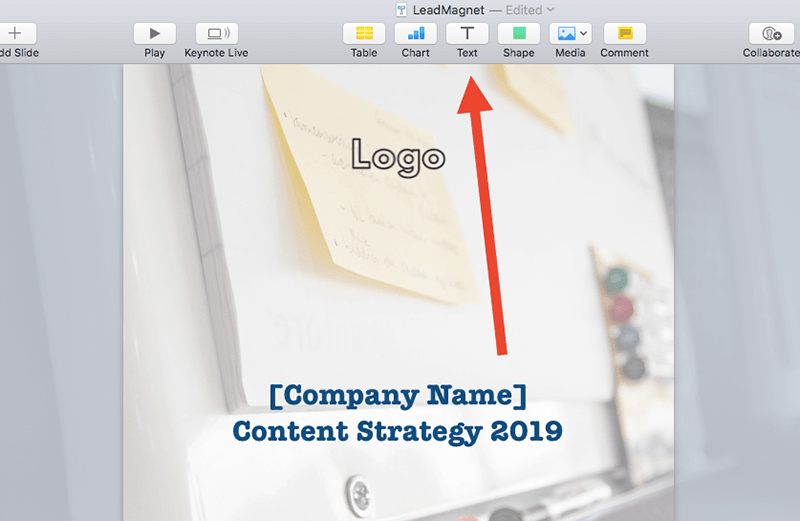
The other changes I made included putting a generic logo at the top and adding some title text to the middle of the page.
You can see the finished product as well as where to add the text in this next screenshot.
Creating Pages for Your Template
For the last step that I’ll show you in this written tutorial, we obviously need some other pages to our guide.
The easiest way to start is to right click on the slide in the left of your presentation and click duplicate to create and exact image of your cover.
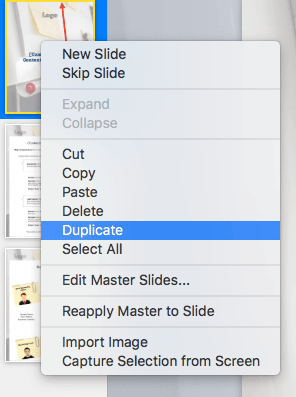
We don’t want to make another cover. So here’s what I’ve done.
- Delete the title
- Move our logo to the top left and made it smaller
- Reduce the opacity of the logo to 50%
Now, we can create a place to put the text and images of our template.
To do this, we’re just going to add a big square, make it fill most of the page and make sure it’s the color I’d like (in this case, white).
In the presentation, next to the “Text” button, there is one that said “Shape”. There are several different options, but for this I’ll use the square.
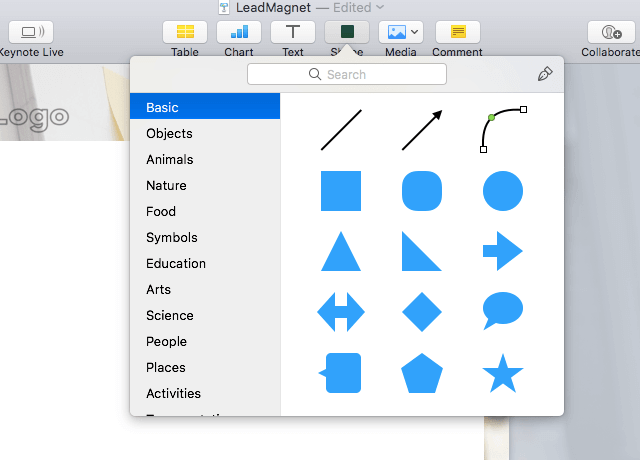
Stretch the square into a rectangle across a large portion of the slide. Next, ensure the rectangle is highlighted and go to the right-hand side of Keynote. Click “Format”, then “Style”. You’ll see a place to change the color. I went with white for simplicity.
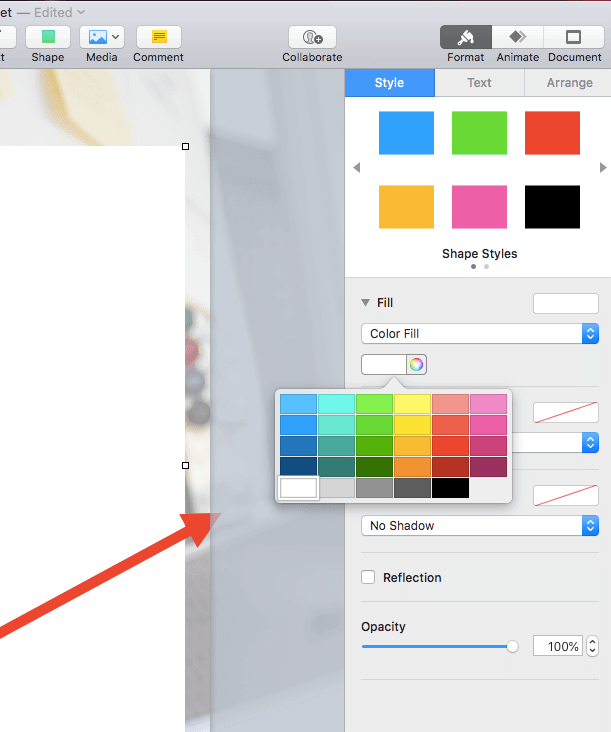
Here’s how it should look in the end:

Okay, now we obviously need some content.
Note: I have created one for you to download and use as you wish. This tutorial is to show you how easy it is to use common tools and create quick, easy lead magnets.
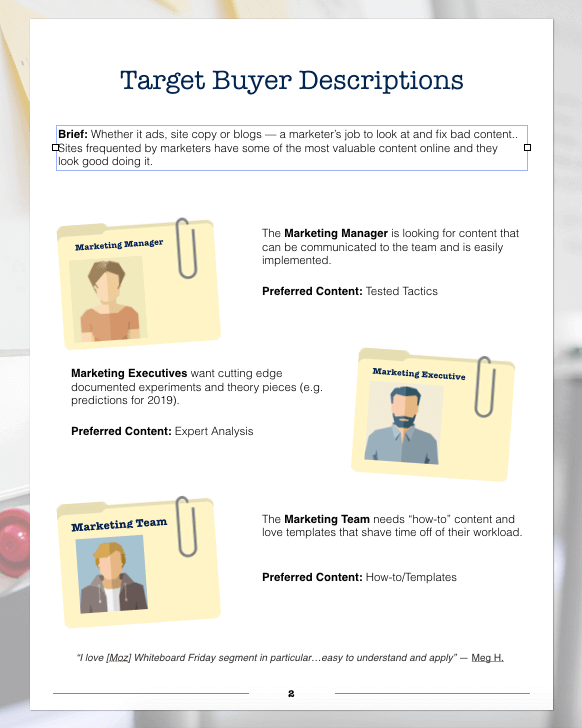
Here’s one of the more finished pages, to give you a more finished look.
Creating the File
If you’re doing a template, you’ll actually just need to save this file and use it as the download. The cool thing about Keynote/Powerpoint is the ability to create quality PDFs from the same files.
When you’re done with the resource, go to “File” then “Export To”. Choose “PDF…” and follow the prompts to save it. Notice (in the image below) that you can also easily create a PowerPoint file from the Keynote.
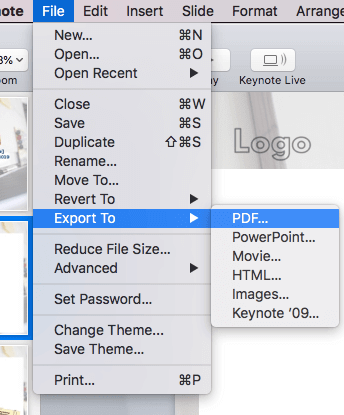
I created the template in Keynote and then exported it to PowerPoint to make sure as many people as possible can download.
The one you can actually download has more pages and a little more depth to it to kind of give you some more ideas including some graphs and things.
But I hope this was a eye-opening tutorial to show you that you can actually create a lead magnet in a day that people will want to download and use to further their business.
Blog Post ReDux in a Couple Hours (Tops)
If you’ve written blogs for a while, you likely have categories of content. For instance, here at Gist, we write about marketing, sales and support.
Over time, many bloggers write multiple pieces of content on the same topic. These posts are all from different angles and support one another.
All the valuable pieces of info from those posts can be formed into one resource. The best part is, you can create multiple resources from the same content.
Things like:
- Infographics
- White Papers
- Ebooks
- Guides
- Playbooks
All from the articles and videos you’ve already created.
While there are a number of things you can do, one of the easiest is to turn regular blog content into either a white paper or an infographic.
For a fast and potentially free option, I recommend Canva.
If you’ve been in marketing for any amount of time, you’ve likely heard of it. Or, maybe you’ve used it for a quick graphic or two.
Using Canva can be great in a pinch, but it can also be an impromptu design department for bootstrapped agencies and businesses.
Given that there are so many options and design preferences, I opted not to do a tutorial.
Instead, I’ll link to a several other video tutorials creating a few other types of lead magnets using Canva.
Further Viewing:
- How to Create an Infographic in Minutes (from Lisa Irby)
- How to Design Gorgeous Lead Magnets and PDFs (from Kimberly Ann Jimenez)
- Make an Ebook in Canva: Beginners Tutorial (from Jason Whaling)
Putting Together a Checklist in Around 20 Minutes
One of the easiest (and quickest) lead magnets in a marketer’s arsenal is the checklist.
It’s perhaps the best resource for a content upgrade strategy. Let’s say, you write a super actionable blog post of 2000 words.
There are tons of things to do, but they’re scattered throughout the post. Someone reading your content may say, “Man, I really need to write all this down!”
Then, like a light shining down on them is an offer to download a resource with all of the actionable tips from your post in one short checklist.
Why It Works: It only takes you the time it takes to write up a 1-2 sentence synopsis of your blog post and pick out all of the valuable action nuggets and put them into list form.
For this tutorial, I’m using Beacon.
Beacon is a lead magnet creation tool that is actually pretty impressive. They have a free forever plan. And besides having their branding, it’s the full tool minus a few features.
The video is literally less than 2 minutes, but I said “in about 20 minutes” because you’ll likely have to come up with the content, how to word it, and image. You get the idea.
Adding a Lead Magnet to WordPress and Your Site
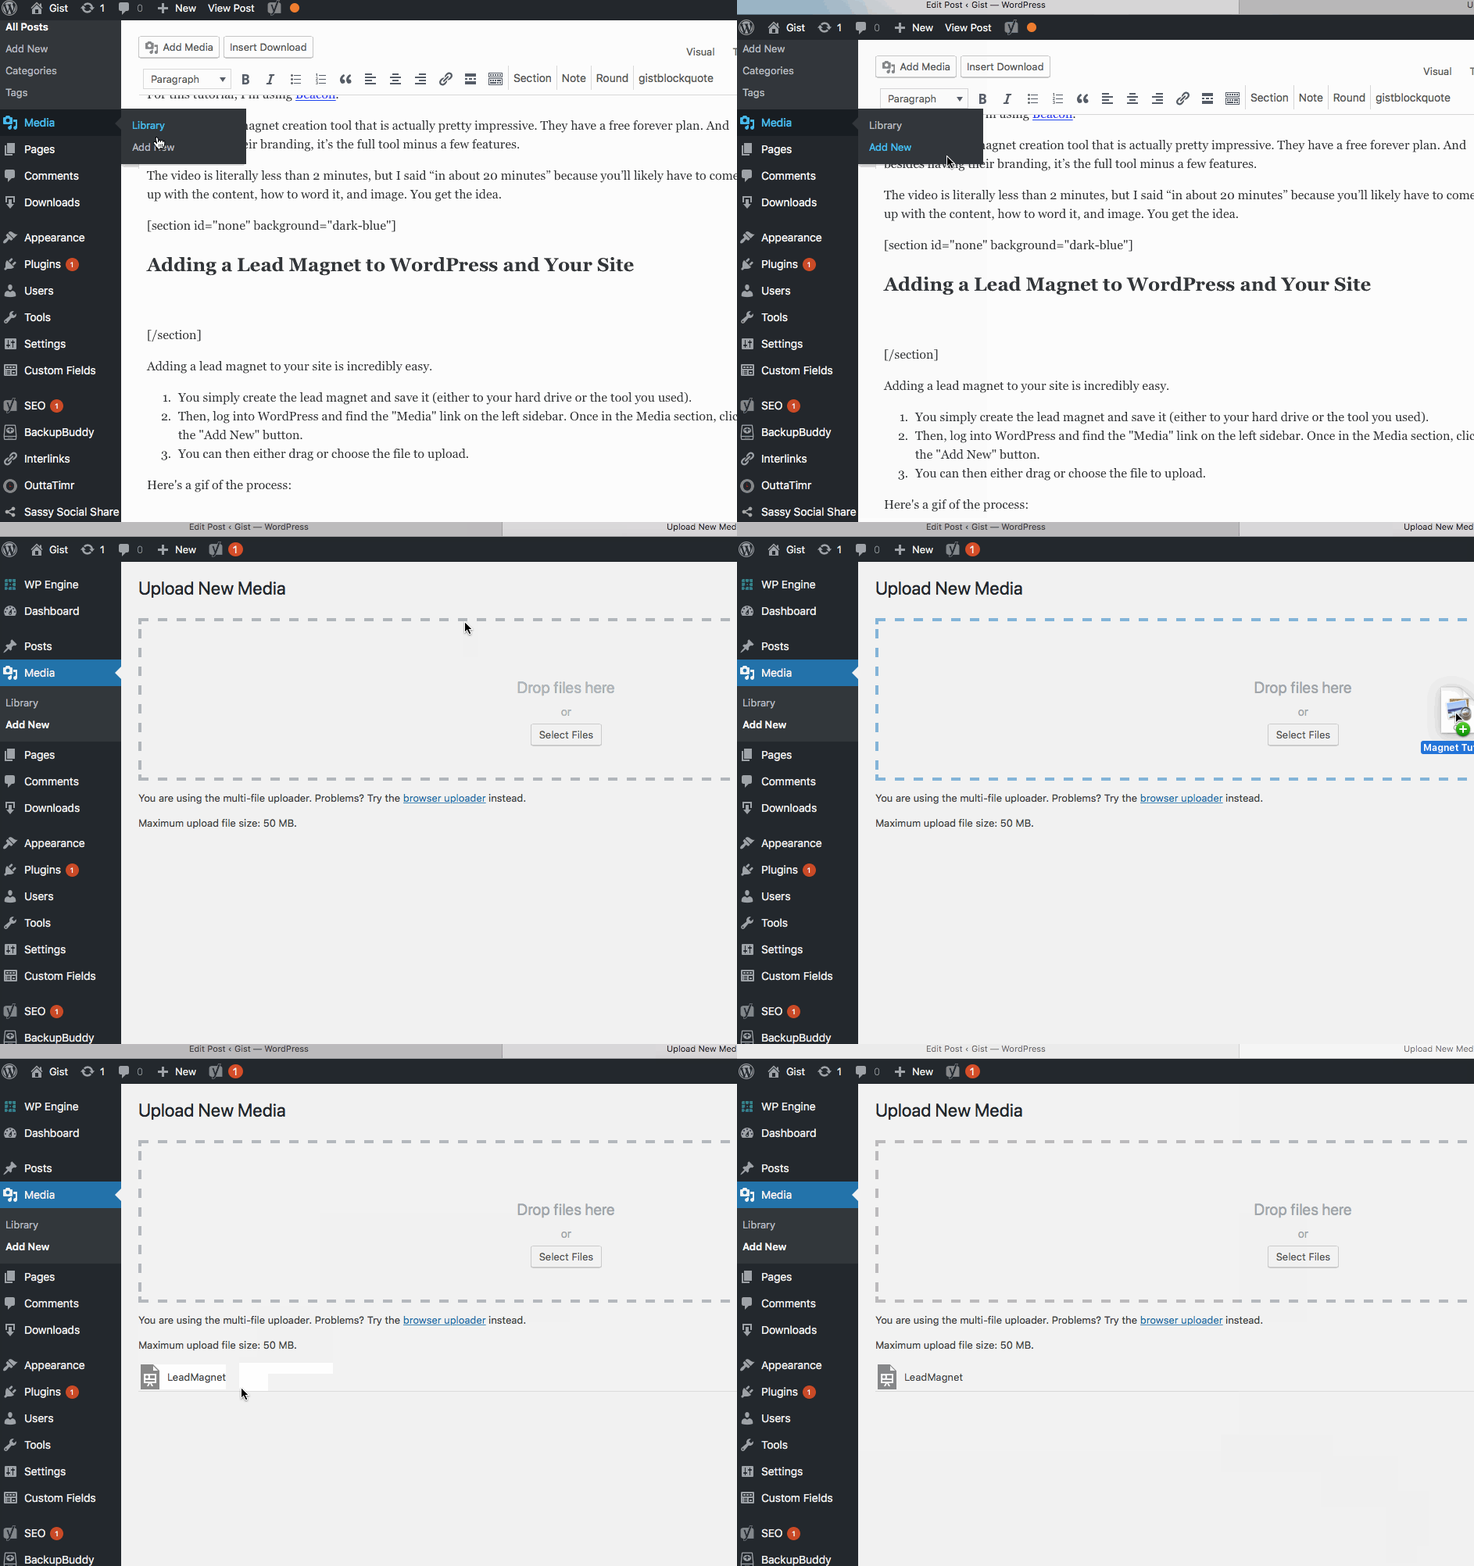
Adding a lead magnet to your site is incredibly easy.
- You simply create the lead magnet and save it (either to your hard drive or the tool you used).
- Then, log into WordPress and find the “Media” link on the left sidebar. Once in the Media section, click the “Add New” button.
- You can then either drag or choose the file to upload.
Here’s a gif of the process.
Now, how you use the lead magnet varies wildly.
Here are a few options.
Site-Wide Resource: This is something that you’re going to offer across your entire site. You can create a form which gathers the desired contact data and either;
- Create a landing page for the download and send the link via email.
- Or, send the user directly to the download link immediately.
Content Upgrade: These are lead magnets geared toward a specific piece or type of content. For instance, in this post, there are a few lead magnets that will not be available on most of the Gist website.
No Opt-In: A lead magnet doesn’t have to get you the contact data anymore — just the visit. You can add a tracking pixel and then advertise to your visitors and get them to come back.
Ready to build a lead magnet of your own? Share yours in the comments below and I’ll try to comment my thoughts!